How to Install Recessed Lighting
Recessed lighting is a great way to add warm, low profile lighting to a kitchen, living room, or dining room. Assuming you will be installing your recessed lighting below an attic and have already run the appropriate wiring, installing a recessed light will take only four steps and no more than an hour. After reading this article, you will be able to plan your recessed lighting layout, cut the opening from the recessed can, install the fixture, and finish the installation with your choice of recessed light trim and reflector light bulb.
Step By Step
Before You Begin
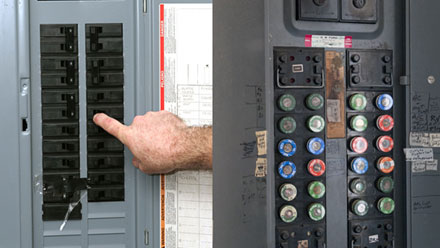
Before you begin, use the circuit breaker to cut off the power to the room and assemble the needed tools and equipment. You will need a measuring tape and pencil to place and mark the spots for your recessed lights. You will also need a wire or coat hanger to mark the location to cut (more on that in step 2) and a hammer to nail the housing to the joists in your attic. Finally, use a mask and goggles to shield your face from drywall debris and insulation.
Step 1: Plan the layout
For an eight-foot ceiling, place the lights no further than five feet apart. Each housing should fall between two ceiling joists. Once you have the ideal location for your lights, mark the center of each location with a pencil.

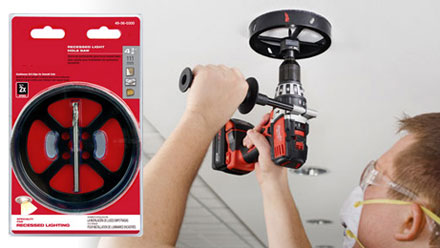
Step 2: Cut the Opening for the Can
Insert a wire or coat hanger through each pencil mark you made in the last step. Look into the attic to check where the wire came through. Ensure it is not too close to a joist or HVAC duct. Assuming your placement will work, return to the room and use a drill and recessed light hole cutter to make a hole for each recessed can.
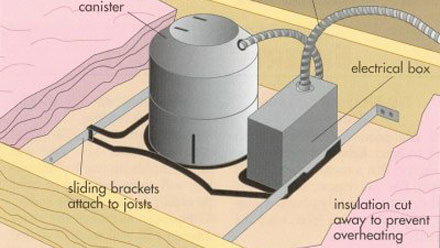
Step 3: Place the Fixture
Return to the attic and place each housing, making sure to fit the can into the opening cut in the last step. Extend the bar hangers to the joists on either side of the fixture and use the hammer to attach the hangers to the joists. Wire each fixture in a "daisy chain."
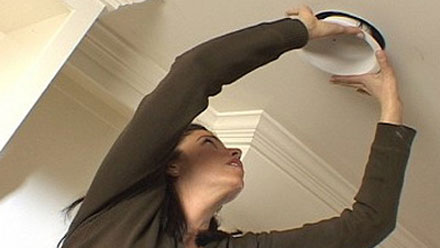
Step 4: Complete the Installation
Finally, you can install the trim of your choosing and screw in the light bulb. Turn the power back on, and enjoy your new lighting!